
Coding Compendium
A free 100-page ebook collecting my projects and tutorials for Raspberry Pi, micro:bit, Scratch and Python. Simply join my newsletter to download it.
By Sean McManus
As a writer, it's really frustrating when Microsoft Office is slow. When I've got an idea for something to write, I want to just be able to get on with writing without any hanging around. It's particularly annoying when you go on the web to check something in the dictionary and it takes a long time to switch back to Word afterwards. My computer was slow to open new applications (including Word, Excel and PowerPoint), and was slow to open files in them. It was also really slow doing basic Windows functions like generating thumbnails in a folder of photos, and I've been working extensively on organising my photos recently, so that was particularly irritating. I had stopped using iTunes sometimes because I have a large music library and that often made the machine slow down.
I thought I would have to buy a new computer to speed things up, which would be a huge expense. But there is a simple and cheap technique that has speeded up my computer no end. Put simply, you can use a USB key (also called USB drive or flash drive) as extra memory for your computer. I'm amazed at how much faster it has made my PC. My applications open quickly, and Windows is much more responsive.
The technology is called ReadyBoost and is available in Windows 7 and Windows Vista. It remains supported in Windows 8.
Here's how you use it:
If your experience is anything like mine, you'll find that plugging in a £10 USB key will make your computer feel like a new machine. You can use multiple USB keys for ReadyBoost too. It enables you to speed up iTunes, and make Word and Excel faster too. Give it a go!
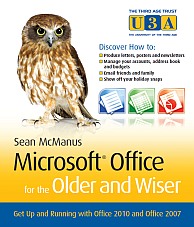
My book Microsoft Office for the Older and Wiser is out now. Through a series of projects, it shows you how to make the most of Word, Excel, PowerPoint and OneNote. You'll learn how to design letters, posters and newsletters; how to work out your holiday budgets and manage your address book with Excel; how to create a photo album with PowerPoint; and how to keep a recipe book using OneNote. There's a bonus chapter showing you how you can use email to keep in touch with friends, too.
Find out more about Microsoft Office for the Older and Wiser.
Update: This book is now out of print and the rights have reverted to me. Copies are still available to buy, and you may find you can borrow it from your local library. If you are interested in Microsoft Excel, I recommend my new book, 100 Top Tips: Microsoft Excel.
© Sean McManus. All rights reserved.
Visit www.sean.co.uk for free chapters from Sean's coding books (including Mission Python, Scratch Programming in Easy Steps and Coder Academy) and more!
A free 100-page ebook collecting my projects and tutorials for Raspberry Pi, micro:bit, Scratch and Python. Simply join my newsletter to download it.
Web Design in Easy Steps, now in its 7th Edition, shows you how to make effective websites that work on any device.
Power up your Microsoft Excel skills with this powerful pocket-sized book of tips that will save you time and help you learn more from your spreadsheets.
This book, now fully updated for Scratch 3, will take you from the basics of the Scratch language into the depths of its more advanced features. A great way to start programming.
Code a space adventure game in this Python programming book published by No Starch Press.
Discover how to make 3D games, create mazes, build a drum machine, make a game with cartoon animals and more!
![]() Top | Search | Help | Privacy | Access Keys | Contact me
Top | Search | Help | Privacy | Access Keys | Contact me
Home |
Newsletter |
Blog |
Copywriting Services |
Books |
Free book chapters |
Articles |
Music |
Photos |
Games |
Shop |
About