Coding Compendium
A free 100-page ebook collecting my projects and tutorials for Raspberry Pi, micro:bit, Scratch and Python. Simply join my newsletter to download it.
Discover how I hacked my own Amstrad CPC game to tweak the difficulty, get rid of an annoying sequence, and change the default keys. Follow me on a journey into the code of The Further Adventures of Fred. By Sean McManus.
I wrote The Further Adventures of Fred between 1989 and 1990. The game is a simple dodge-the-baddies, collect the tokens game, without gravity. Looking back, it was probably influenced in part by Mutant Monty, which was a game I'd enjoyed a few years earlier.
Future Publishing paid me to include The Further Adventures of Fred on the Amstrad Action cover tape, but it never got that far. I heard it was scheduled to appear on issue 118, which was cancelled as the magazine ceased publication. There was a long time between the game being licensed and AA closing, so in between I released the game myself and AA reviewed it and gave it 75%.
The game is like a time capsule for me, containing lots of cultural references that were significant to me at the time. The final level is inspired by Jean-Michel Jarre's Destination Docklands concert, which I had attended the year before. There are several references to Pink Floyd in there, and lots of in-jokes. The square Fred character is based on the smiley face character in the Amstrad character set, which had featured in my first game on the machine, written on Boxing Day in 1984. I wrote it again a few days later, because we didn't have a blank tape to save it on first time around.
Below is a video of the game, but you can now try it for yourself in your browser here!
There were several things that always bothered me about The Further Adventures of Fred:
So, in 2020, I decided to fix the game. The question was: could I do it, thirty years on, and without much documentation to go on?
At one point, I had the source code for the game running from ceiling to floor in my room, printed on continuous printer paper. I'd stare at the code for ages trying to find bugs in it. When I came back to this in 2020, I did find a print out that I could tell had been stuck to the ceiling, but it looked like quite an early version. I couldn't remember enough about Z80 assembly language to make sense of it, either.
Going through my old development discs, I found a BASIC program I wrote that compiled the game from separate files. This was a big help, because it gave me a clue as to where I'd find different parts of the game code. On the offchance anyone else wants to nose around in the code or I come back to it another day for some reason, this is what I found:
| Address | Contents |
|---|---|
| 4500 (&1194) | Squid sprite. This was a big one, added quite late, so it looks like I just dropped it down here. It takes up a huge amount of screen space and memory for an image that is, fundamentally, not very good. |
| 8731 (&221B) | Text content. This includes a lot of control codes used for formatting, including to make it look like the machine has reset at the end of level 1. Looking back, that's quite an efficient solution because the machine code only needs to print the characters. The formatting is built in. I think at least some of the mode changes are executed using control codes, even when no text needs to be displayed. There is some padding at the start of this section that was used for hidden greetings at one time, but they're not in there now. Here's a little program to view this data. If you make line 3 always print the character, you'll see all the mode and pen changes too.
|
| 10089 (&2769) | Levels data. More details below on that. |
| 13900 (&364C) | Digitized scream sound effect. CALL 13900 to hear it. |
| 16640 (&4100) | Sprites, glorious sprites! The sprites were created using my Sprite Definer, which was on an AA covertape. |
| 33841 (&8431) | Music. The music was created using Micro Music Creator. If you CALL 33841 you can use |MUSICON to hear the game completion tune. The game just goes straight to the code that plays the music when it's required, rather than using the RSXs. I think there are several tunes from Micro Music Creator in this block of code. I don't know where the others begin. |
| 39319 (&9997) | Game code. To run the game use CALL 39319. |
| 41623 (&A297) | Sprite addresses. I think this is a lookup table that converts sprite numbers into sprite addresses. |
I've included the addresses in both decimal and hexadecimal above. My original code used decimal, mostly. Over the course of this update project, I drifted towards using hex more because that's what the Winape debugger uses. You can find a simple hexadecimal to decimal converter in my book chapter about using machine code with BASIC programs.
With no real documentation to go on, I was in the strange position of "hacking" my own game to try to work out how the data was structured.
It was all about finding patterns. I started by looking at the levels data starting at 10089 and looking for numbers in the ASCII range (for the name of the level) and for repeating patterns that might represent the walls and the tokens you have to collect. Level 1 (in the original game) only had bricks, tokens, and monsters, so it wasn't too hard to spot the pattern.
| Offset from start of level | Contents |
|---|---|
| 0 | Title of the level. Fixed, 20 characters. Start address + 19 is the last one. Spaces (ASCII 32) are used for padding to centre the text. |
| 20 | 0. Don't know why this is here. I suspect I miscalculated and left an extra byte by mistake. |
| 21 | Screen map starts. There are 10 rows, each made up of 20 columns. The screen map goes from left to right, top to bottom. A 0 means a sprite isn't drawn at that position, but big images can spill over into 0 spaces. A 7 is a token to collect. |
| 221 | 5 bytes. I think this is the colour data? If I recall correctly, some of the inks are fixed, but some of them can be defined. I suspect blinking colours, which are used in a few places, including for colour swapping animation, are defined in code and not in the levels data. It's possible they're defined in the text data using control codes.. |
| 226 | The movement pattern for this level. All enemies follow the same movement pattern. The direction numbers are (I think):
|
| 230 | The number of enemies on this level. |
| 232 | Enemy data begins. I think this takes this form:
|
| 253 | The number of tokens on this level. |
There's a great feature in the Winape emulator that enables you to copy and paste code into the emulator, that then gets typed into the virtual Amstrad. Find it under File > Auto Type or use Ctrl + F5. You can use it to copy and paste the code here so you can explore the data. First load the game into memory. You'll need to give this a moment to load. Don't add more commands after it in the F5 window, because they won't run correctly.
memory &1194

load"faf20.bin"
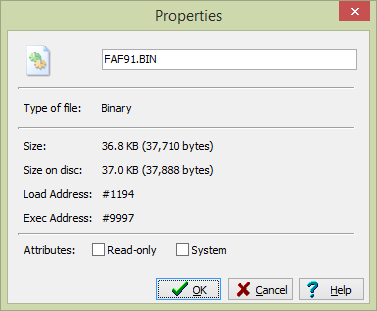
I'm assuming you're using the latest version of my Amstrad games disc. If not, use the filename faf91.bin instead.
Now use the Auto Type feature to enter this listing:
1 mem=10089:for level=1 to 15:print string$(60,"-");:print:print"LEVEL:";level

2 print"MEM:",mem:for char=1 to 20:print chr$(peek(mem));:mem=mem+1

3 next:print peek(mem):mem=mem+1

4 for rows=1 to 10:for cols=1 to 20:a$=hex$(peek(mem),2):if peek(mem)=0 then a$=".." else if peek(mem)=7 then a$="##"

5 print a$;" ";

6 mem=mem+1:next:print:next:print:print"MEM:",mem:print

7 for g=1 to 33:print peek(mem);:mem=mem+1:next:print:next level
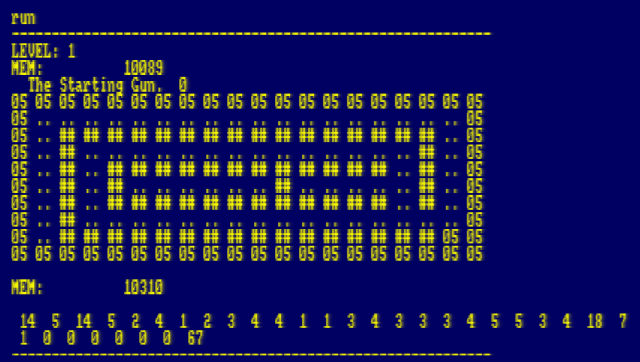
Here's an example of what the output looks like, with The Starting Gun screen. This is a particularly good one to look at because it's just bricks around the edge, and tokens in the middle. The dots represent 0 spaces and the ## are tokens. This screengrab is from after I'd already modified this level by moving one of the tokens, but before I changed level 1 to a different design.
So here is an example of a poke we can create using this information. You'll need to load the game code first using the code snippet above. The code won't load if there's a BASIC program in memory, so load the game code and then enter this program. This program changes the number of tokens on each level to 1, so that you complete the level if you collect a single token.
1 for levels=1 to 15

2 poke 10088+(levels*254),1

3 next

4 call 39319
That's maybe not the most useful poke. If you want to see all the levels, there's a cheat mode you can use: Shift+1 completes the level.
You could use the information above to change the screen layouts too. I made two changes in the updated version of the game, which is available on the new version of my games disc:
1 for mem=10089 to 10342

2 oldstart=peek(mem)

3 poke mem, peek(mem+508)

4 poke mem+508, oldstart

5 next
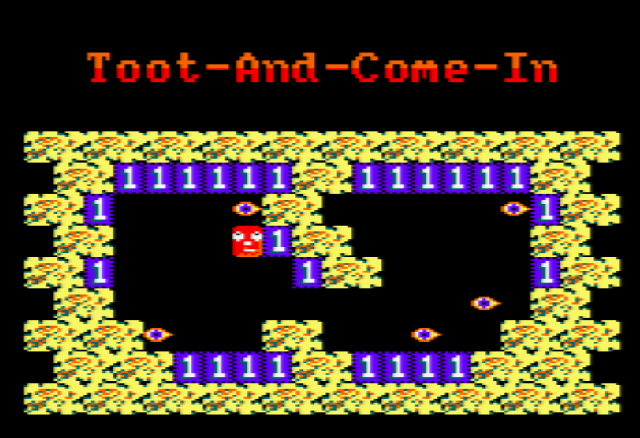
The new starting screen in The Further Adventures of Fred
 I was really keen to get rid of the sequence that fakes a machine crash at the end of the first level.
Here's how I went about that:
for mem=&9e14 to &9e1d:poke mem,0:next:poke &9e20,&c9
That worked! The pace of the game is much better flowing smoothly from level 1 to level 2, without the distraction of the fake reset in between.
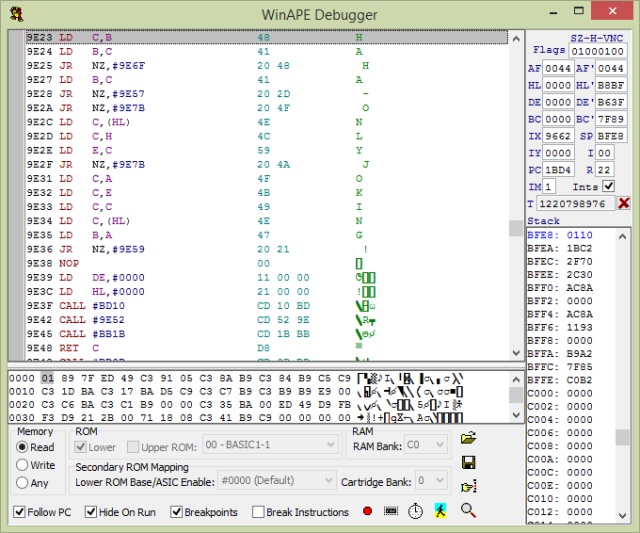
Press F7 in Winape to access the built-in debugger and disassembler. It's worth remembering that the disassembler doesn't know what's data and what's code. Here you can see it provides disassembly for the text, which doesn't make sense as machine code.
The default keys in the game are joystick, which means pretty much everyone nowadays has to start by redefining them. It's friction nobody needs. I wanted to make the default keys something more sensible.
Here's the process I went through:
5 ' Find a CALL instruction

10 for mem=39319 to 41623

20 if peek(mem)=&cd and peek(mem+1)=&09 and peek(mem+2)=&bb then print mem

30 next
The code to change the default keys to cursor keys with Q to quit is:
POKE &9FAE,&F0

POKE &9FB3,&F1

POKE &9FB8,&F2

POKE &9FBD,&F3

POKE &9FC2,&71
Another great feature in Winape is the File Properties. Find it using File > Disc A > Edit disc and then right-click a file and select Properties. It gave me a good start working out how to save the game once I'd finished tinkering with it.
After making any customizations, you can save your game file using:
save"custom",B,4500,37710,39319
The new version of the game is much easier to get started with, so I hope you'll consider giving it a go.
You can play The Further Adventures of Fred in an emulator in your browser right now!
You can also find The Further Adventures of Fred on my Amstrad CPC games disc, which includes updates to my other programs too. Find my other Amstrad CPC resources and tutorials here.
© Sean McManus. All rights reserved.
Visit www.sean.co.uk for free chapters from Sean's coding books (including Mission Python, Scratch Programming in Easy Steps and Coder Academy) and more!
A free 100-page ebook collecting my projects and tutorials for Raspberry Pi, micro:bit, Scratch and Python. Simply join my newsletter to download it.
Web Design in Easy Steps, now in its 7th Edition, shows you how to make effective websites that work on any device.
Power up your Microsoft Excel skills with this powerful pocket-sized book of tips that will save you time and help you learn more from your spreadsheets.
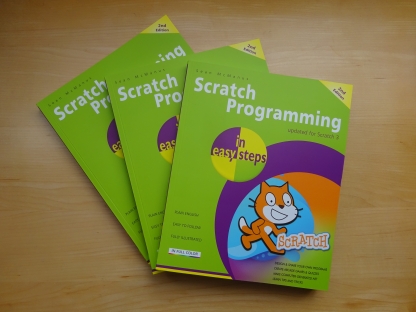
This book, now fully updated for Scratch 3, will take you from the basics of the Scratch language into the depths of its more advanced features. A great way to start programming.
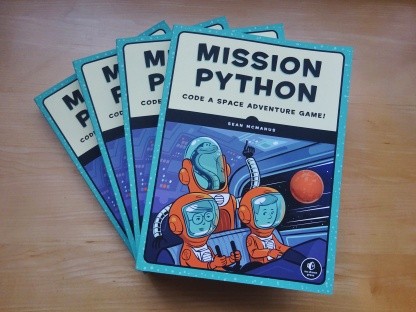
Code a space adventure game in this Python programming book published by No Starch Press.
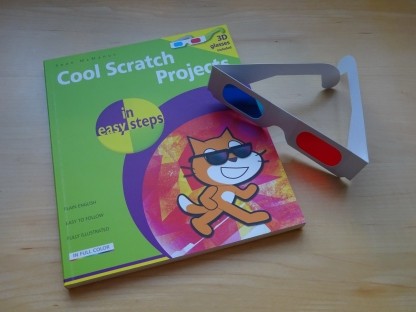
Discover how to make 3D games, create mazes, build a drum machine, make a game with cartoon animals and more!
![]() Top | Search | Help | Privacy | Access Keys | Contact me
Top | Search | Help | Privacy | Access Keys | Contact me
Home |
Newsletter |
Blog |
Copywriting Services |
Books |
Free book chapters |
Articles |
Music |
Photos |
Games |
Shop |
About