Coding Compendium
A free 100-page ebook collecting my projects and tutorials for Raspberry Pi, micro:bit, Scratch and Python. Simply join my newsletter to download it.
 ArtEvolver is a Python program that endlessly blends images to create a constantly changing artwork. You can run it on any computer, but it looks particularly good running on a small screen in a photo frame. The project was inspired by Brian Eno's 77 Million Paintings software. With ArtEvolver, you can curate your own collection of images to personalise the art.
I wrote two articles for The MagPi magazine about ArtEvolver.
The MagPi is avaliable for free download, but you can support the magazine by subscribing here, or buying a copy in a shop.
UPDATE: You can now download both parts in a single PDF here.
You can personalise ArtEvolver with your own pictures. I've been particularly interested in adding textures (stone, sand, paper) that make the art seem less clinical, and illustrations that add a human touch.
There are lots of places you can find photos online that are free to use, including:
Search for patterns, paint, textures, neon lights, monochrome photos, signs, street art, and illustrations. Use images with words sparingly. If a photo looks interesting by itself, it's a good candidate, but ArtEvolver can't rescue dire stock art.
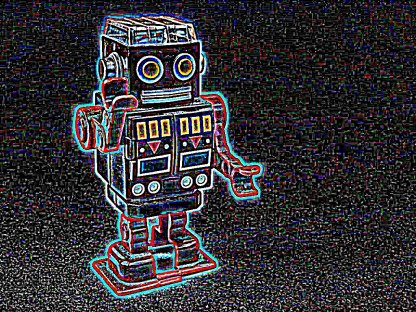
Here's a photo of my toy robot I processed using ImageMagick's edge effect before feeding it into ArtEvolver.
I also used the iPad app RetroSpecs to change the resolution and colour palette on some of my input images. You wouldn't want to overuse effects like this, but turning some images into ASCII art, or applying vibrant 80s colour palettes, can make some photos work much better in ArtEvolver.
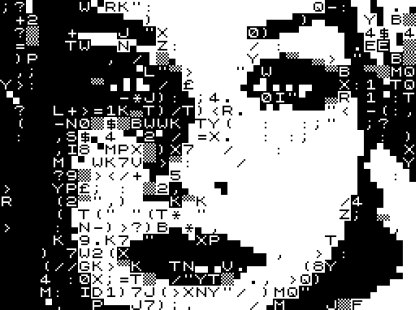
This ZX-81 recreation of a photo of a woman's face works better in ArtEvolver than the original image did, especially when combined with colourful textures.
For best results, I recommend resizing your images to fit the screen. I experienced crashes when I was running multiple high-resolution images through ArtEvolver, presumably because Pygame isn't designed to handle huge images.
Part 1 of the tutorial includes a bash script to rotate any portrait images, so all your images are landscape format. The program works best if most of your images fill the display. If you're downloading textures and patterns, it doesn't really matter which way around they are. If you have portrait images that would look odd on their side, you can keep them as-is by removing them from the folder you run this script in. ArtEvolver centres any images that don't fill the screen.
Here's the code to copy and paste.
#!/bin/bash
# Rotates portrait images (only) in the current folder
# From ArtEvolver Tutorial in The MagPi - by Sean McManus

mkdir original_images

# Remove any extensions in the list below that you're not using to avoid error messages
for image_file in *.jpg *.JPG *.png *.PNG;
do
# Make sure there is no space around the = below
    width=$(identify -format "%w" $image_file)
    height=$(identify -format "%h" $image_file)
    if test $height -gt $width
    then
        echo "$image_file is portrait shape [$width x $height]. Rotating..."
        new_name="rotated-${image_file}"
        convert -rotate 90 "$image_file" "$new_name"
        mv $image_file original_images
    else
        echo "$image_file is landscape already [$width x $height]."
    fi
done
To use this code, you'll need to save it as landscapify.sh, make it executable, and then run it from the command line in the folder that contains your images, like this:
chmod +x landscapify.sh
./landscapify.sh
The code assumes you have installed ImageMagick. Install with:
sudo apt install imagemagick
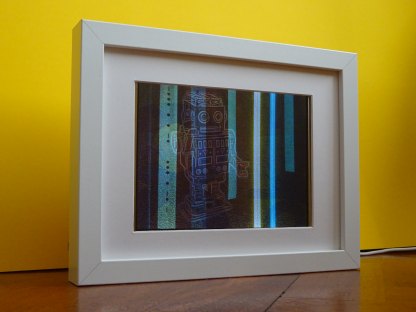
For best results, install ArtEvolver on a Raspberry Pi and mount it inside a picture frame, such as the Ikea Ribba frame pictured here. I'm using a Pimoroni 8" HDMI display, which is the same one that features in the PiCade. I ran my first prototype on the PiCade to see how it would look before buying a new screen for this project. I am running this project on a Raspberry Pi 4.
The article explains how to make the program automatically run when the Raspberry Pi is powered on. To ensure a safe shutdown, I added code to detect a mouseclick to quit the program. (A mouse was the easiest way to add a one-button control to the device. You might prefer to connect a button to the GPIO pins).
When the program quits, the command line can be configured to issue a shutdown command. I added a three-minute delay before the shutdown, to avoid locking myself out of the computer and ensure I had time to find and plug in a keyboard, and cancel the shutdown, if I needed to make any changes.
Here is the full Python code for ArtEvolver to copy and paste. For an explanation of how it works, read Part 2 of the tutorial in The MagPi.
# ArtEvolver - by Sean McManus - www.sean.co.uk
import pygame, random, os
pygame.init()

win_width = 1024
win_height = 768
windowSurface = pygame.display.set_mode((win_width, win_height))
pygame.display.set_caption('ArtEvolver')
pygame.mouse.set_visible(False)

class Slide:
    def __init__(self, filename, opacity):
        self.filename = filename
        self.opacity = opacity

def index_images(path, images_list):
    for dir_or_file in os.listdir(path):
        path_plus_dir_or_file = os.path.join(path, dir_or_file)
        if os.path.isdir(path_plus_dir_or_file):
            index_images(path_plus_dir_or_file, images_list)
        elif dir_or_file.lower().endswith('.png') or dir_or_file.lower().endswith('.jpg'):
            images_list.append(path_plus_dir_or_file)
    return images_list

pictures = index_images("images_folder", [])

while True:
    sequence = pictures.copy()
    random.shuffle(sequence)

    # Set up initial list of current slides
    current_slide_list = []
    starting_opacities = [-90, -45, 45, 90, 135]
    for layer_opacity in starting_opacities:
        this_image = sequence.pop(0)
        this_slide = Slide(this_image, layer_opacity)
        current_slide_list.append(this_slide)

    while len(sequence) > 0:
        windowSurface.fill((0,0,0)) # Black
        for this_slide in current_slide_list:
            image_to_show = this_slide.filename
            new_opacity = this_slide.opacity + 1
            if new_opacity == 150:
                new_opacity = -150
            elif new_opacity == 0:
                this_slide.filename = sequence.pop(0) # replace image in this slide
            this_slide.opacity = new_opacity

            image_to_show = pygame.image.load(this_slide.filename)
            image_width = image_to_show.get_width()
            image_height = image_to_show.get_height()

            # Images are scaled for the long side (fit, not fill, the window)
            if image_height > image_width:
                scaling_factor = image_height / win_height
                new_width = int(image_width / scaling_factor)
                image_to_show  = pygame.transform.scale(image_to_show, (new_width, win_height))
            else:
                scaling_factor = image_width / win_width
                new_height = int(image_height / scaling_factor)
                image_to_show  = pygame.transform.scale(image_to_show, (win_width, new_height))

            # Remove # on next line if your screen is upside down
            #image_to_show = pygame.transform.flip(image_to_show, True, True)

            # get new height and width
            image_width = image_to_show.get_width()
            image_height = image_to_show.get_height()

            image_to_show.set_alpha(abs(new_opacity))
            windowSurface.blit(image_to_show,
                    (int(win_width/2) - int((0.5*image_width)),
                     int(win_height/2) - int((0.5*image_height))))

        pygame.display.update() # Shows composite after all slides have been blitted
        pygame.time.wait(30) # Adjust timings here if necessary

        for event in pygame.event.get():
            if event.type == pygame.MOUSEBUTTONUP:
                pygame.quit()
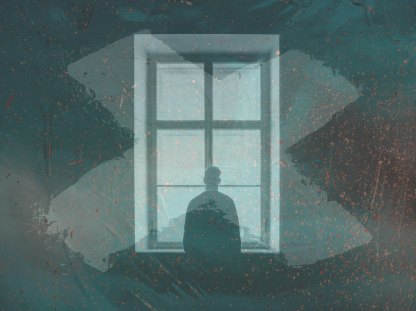
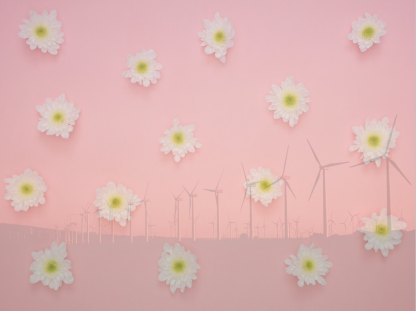
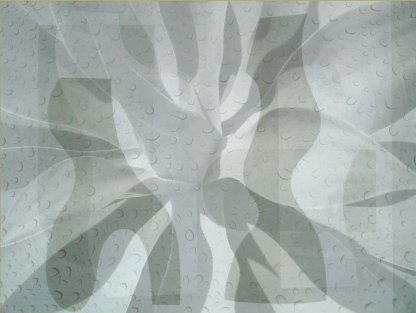
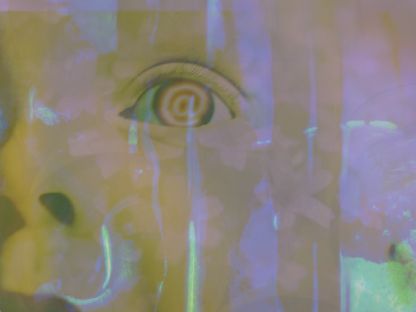
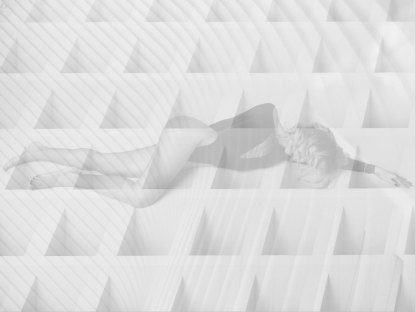
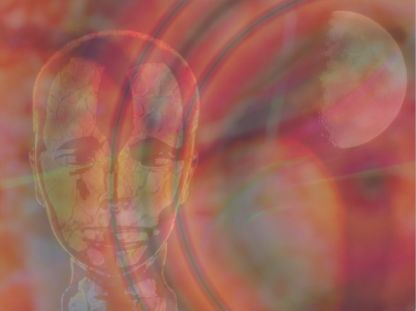
Here are some moments I screengrabbed from the sequence using the library of images I've put into ArtEvolver. Not all moments are perfect: sometimes slides clash (especially if you have too many with words on) and some slides don't work as well as you expect. I continue to add new slides as I take photos, and remove slides that don't quite work. I find it works best if you look at it from time to time, rather than trying to watch it as a video sequence.
Find more Raspberry Pi projects and tutorials here.
© Sean McManus. All rights reserved.
Visit www.sean.co.uk for free chapters from Sean's coding books (including Mission Python, Scratch Programming in Easy Steps and Coder Academy) and more!
A free 100-page ebook collecting my projects and tutorials for Raspberry Pi, micro:bit, Scratch and Python. Simply join my newsletter to download it.
Web Design in Easy Steps, now in its 7th Edition, shows you how to make effective websites that work on any device.

Power up your Microsoft Excel skills with this powerful pocket-sized book of tips that will save you time and help you learn more from your spreadsheets.
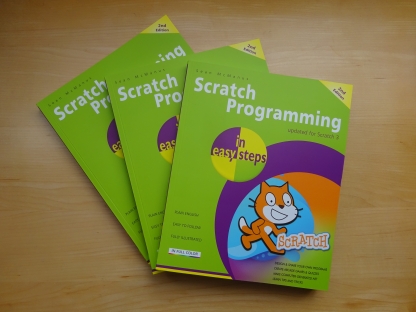
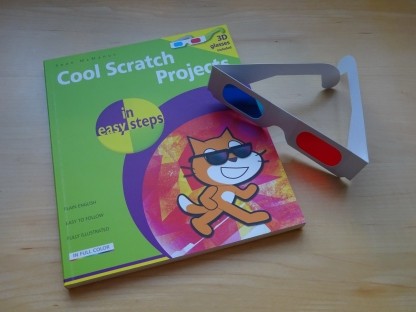
This book, now fully updated for Scratch 3, will take you from the basics of the Scratch language into the depths of its more advanced features. A great way to start programming.
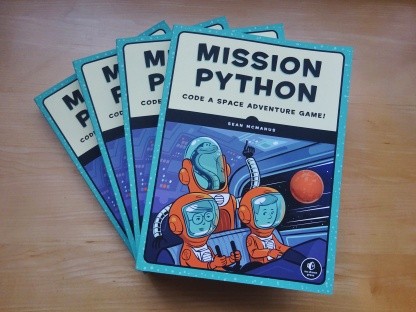
Code a space adventure game in this Python programming book published by No Starch Press.
Discover how to make 3D games, create mazes, build a drum machine, make a game with cartoon animals and more!
![]() Top | Search | Help | Privacy | Access Keys | Contact me
Top | Search | Help | Privacy | Access Keys | Contact me
Home |
Newsletter |
Blog |
Copywriting Services |
Books |
Free book chapters |
Articles |
Music |
Photos |
Games |
Shop |
About